SEO Meta Description: Learn how to clean your turntable needle with our comprehensive guide. Discover the best techniques, tools, and tips to keep your vinyl records sounding their best.
Introduction
Vinyl records are making a big comeback, and with them, the importance of maintaining your turntable. One crucial aspect of this maintenance is cleaning the turntable needle, also known as the stylus. A dirty needle can lead to poor sound quality and even damage your precious records. In this guide, we’ll walk you through the best methods and practices to clean your turntable needle effectively.
Table of Contents
| Heading | Sub-topics |
|---|---|
| Understanding the Importance of a Clean Needle | Why Clean Your Turntable Needle? |
| Impact on Sound Quality | |
| Potential Damage from a Dirty Needle | |
| How Often Should You Clean Your Turntable Needle? | Frequency of Cleaning |
| Signs Your Needle Needs Cleaning | |
| Essential Tools for Cleaning Your Turntable Needle | Stylus Brush |
| Cleaning Solution | |
| Magic Eraser | |
| Step-by-Step Guide to Cleaning Your Turntable Needle | Preparation |
| Using a Stylus Brush | |
| Applying Cleaning Solution | |
| Magic Eraser Method | |
| Common Mistakes to Avoid When Cleaning Your Needle | Over-Cleaning |
| Using the Wrong Tools | |
| Maintaining Your Turntable for Optimal Performance | Regular Maintenance Tips |
| Storing Your Records Properly | |
| FAQs About Cleaning Turntable Needles | What Happens If I Don’t Clean My Needle? |
| Can I Use Alcohol to Clean My Needle? | |
| How Do I Know If My Needle Is Worn Out? | |
| How Often Should I Replace My Needle? | |
| Is Professional Cleaning Necessary? | |
| What’s the Best Cleaning Solution for My Needle? | |
| Conclusion | Final Tips and Recommendations |
Understanding the Importance of a Clean Needle
Why Clean Your Turntable Needle?
A clean turntable needle is essential for preserving the quality of your music. Dust, dirt, and grime can accumulate on the needle, leading to distortion and noise. Regular cleaning ensures that your records play smoothly and sound their best.
Impact on Sound Quality
A dirty needle can cause a variety of sound issues, such as hissing, popping, and overall distortion. This detracts from the listening experience and can be especially frustrating when trying to enjoy your favorite albums. The needle is the critical component that reads the grooves of your records, and any foreign material can interfere with this process. Clean needles ensure that you hear the music as the artist intended.
Potential Damage from a Dirty Needle
Not only does a dirty needle affect sound quality, but it can also damage your records. The debris on the needle can scratch the surface of the vinyl, leading to permanent damage. Regular cleaning helps prevent this and extends the life of both your needle and records. Even minor scratches can degrade sound quality, and over time, significant damage can render a record unplayable. Proper maintenance protects your investment in both your records and your equipment.
How Often Should You Clean Your Turntable Needle?
Frequency of Cleaning
Ideally, you should clean your turntable needle before every listening session. This might seem excessive, but it ensures optimal performance and longevity of your equipment. Consistent cleaning habits can prevent the buildup of debris that requires more intensive cleaning efforts later on. If you play records frequently, consider cleaning the needle every few hours of playback.
Signs Your Needle Needs Cleaning
If you notice a decline in sound quality, such as increased noise or distortion, it’s a sign that your needle needs cleaning. Visible dust or grime on the needle is another clear indicator. Additionally, if your needle skips more often or doesn’t track smoothly across the record, it could be due to dirt buildup. Regular inspection of the needle can help catch these issues early.
Essential Tools for Cleaning Your Turntable Needle
Stylus Brush
A stylus brush is a must-have tool for any vinyl enthusiast. These brushes are specifically designed to clean the delicate needle without causing damage. They are typically made with fine, soft bristles that can reach into the tiny crevices of the stylus. Using a stylus brush regularly helps maintain optimal performance and sound quality.
Cleaning Solution
Specialized cleaning solutions can help dissolve stubborn dirt and grime. It’s important to use solutions that are safe for your needle and do not contain harsh chemicals. Look for solutions that are specifically formulated for turntable needles to avoid any potential damage. These solutions can enhance the effectiveness of your cleaning routine, ensuring that your needle is thoroughly cleaned without any residue.
Magic Eraser
A Magic Eraser can be an effective and inexpensive tool for cleaning your needle. However, it should be used with caution to avoid damaging the stylus. The Magic Eraser’s micro-abrasive texture can lift away dirt, but it’s crucial to use it gently. This method is popular among vinyl enthusiasts for its ability to clean thoroughly without the need for liquid solutions.
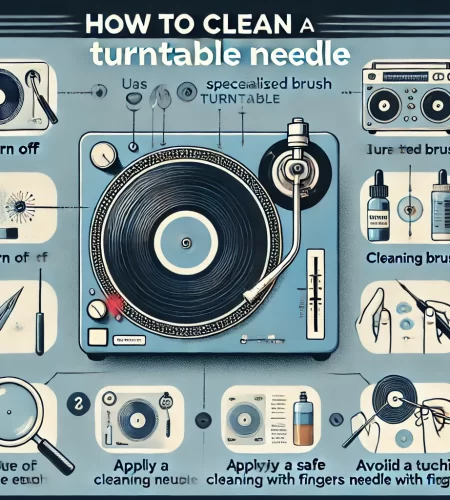
Step-by-Step Guide to Cleaning Your Turntable Needle
Preparation
Before you start cleaning, make sure your turntable is turned off and unplugged. This ensures safety and prevents any accidental damage to the needle or records. Remove any records from the platter and secure the tonearm to prevent movement. Having a stable, clean work area is also important to avoid introducing new dust or debris during the cleaning process.
Using a Stylus Brush
- Gently lower the tonearm so that the needle rests on the stylus brush.
- Carefully move the brush from back to front (never side to side) to remove dust and debris.
- Repeat the process a few times until the needle appears clean.
Using a stylus brush is a simple yet effective way to keep your needle clean. The key is to always move the brush in the direction that matches the record’s grooves, ensuring you don’t damage the stylus. Regular use of the brush can prevent the accumulation of debris, making more intensive cleaning less frequent.
Applying Cleaning Solution
- Apply a small amount of the cleaning solution to the stylus brush.
- Repeat the brushing process, ensuring the solution reaches all parts of the needle.
- Allow the needle to dry completely before playing any records.
Cleaning solutions can break down and dissolve stubborn grime that a dry brush might miss. Be careful not to over-saturate the brush; a little solution goes a long way. Make sure the needle is completely dry before use to avoid any potential damage to your records or stylus.
Magic Eraser Method
- Cut a small piece of the Magic Eraser.
- Lower the needle onto the Magic Eraser gently.
- Lift and repeat a few times, ensuring not to drag the needle across the eraser.
The Magic Eraser method is effective for deep cleaning. However, it’s important to use this method carefully to avoid exerting too much pressure on the stylus. The micro-abrasive material can lift dirt without the need for liquid cleaners, making it a convenient option.
Common Mistakes to Avoid When Cleaning Your Needle
Over-Cleaning
While it’s important to keep your needle clean, over-cleaning can cause wear and tear. Stick to regular maintenance and avoid excessive cleaning. Over-cleaning can also lead to unnecessary handling of the needle, increasing the risk of accidental damage. Balance is key: clean enough to maintain performance, but not so much that it causes harm.
Using the Wrong Tools
Using improper tools, such as regular household brushes or harsh chemicals, can damage the delicate stylus. Always use tools and solutions designed for turntable needles. Household items are not crafted for the precision needed to clean a stylus and can cause more harm than good. Investing in the right tools ensures the longevity and performance of your equipment.
Maintaining Your Turntable for Optimal Performance
Regular Maintenance Tips
In addition to cleaning the needle, regularly dust your turntable and keep it covered when not in use. Ensure your records are clean before playing to reduce the amount of dirt transferred to the needle. Regularly check and adjust the tracking force and anti-skate settings of your tonearm to ensure optimal performance. Keeping your turntable in a dust-free environment can significantly reduce the need for frequent deep cleaning.
Storing Your Records Properly
Store your records vertically in a cool, dry place. Avoid stacking them, as this can cause warping and increase the likelihood of dirt and dust accumulation. Use inner and outer sleeves to protect your records from dust and scratches. Proper storage not only preserves the quality of your records but also reduces the amount of dirt that can transfer to your needle.
FAQs About Cleaning Turntable Needles
What Happens If I Don’t Clean My Needle?
A dirty needle can cause sound distortion, damage to records, and ultimately reduce the lifespan of both the needle and your vinyl collection. Neglecting cleaning can lead to permanent damage to your records and costly repairs or replacements for your turntable components.
Can I Use Alcohol to Clean My Needle?
It’s not recommended to use alcohol as it can dissolve the adhesive holding the needle in place. Stick to specialized cleaning solutions. Alcohol can also dry out and damage the delicate components of the stylus, leading to degraded performance or even breakage.
How Do I Know If My Needle Is Worn Out?
If you notice a significant drop in sound quality, visible wear, or skipping, it might be time to replace your needle. Other signs include a consistent increase in noise and a lack of clarity in the audio playback. Regularly inspecting your needle under a magnifying glass can help you spot wear before it becomes a problem.
How Often Should I Replace My Needle?
On average, a needle should be replaced after 1,000 hours of playtime. This can vary depending on the quality of the needle and records. Higher-end needles may last longer, but regular use and cleaning are essential to maximize their lifespan. Keeping track of your listening hours can help you plan for timely replacements.
Is Professional Cleaning Necessary?
Professional cleaning can be beneficial, especially if you’re unsure about doing it yourself or have high-value equipment. Professional services can offer deep cleaning and maintenance that go beyond what you can do at home, ensuring your equipment remains in top condition.
What’s the Best Cleaning Solution for My Needle?
Use a cleaning solution specifically designed for turntable needles to ensure safety and effectiveness. These solutions are formulated to remove dirt without leaving residue or causing damage. Avoid generic or household cleaners, which may contain harsh chemicals not suited for delicate stylus cleaning.
Conclusion
Regularly cleaning your turntable needle is crucial for maintaining the sound quality of your vinyl records and extending the life of your equipment. By following the steps outlined in this guide, you can enjoy your music collection with the best possible sound.
Remember, the key to a great listening experience lies in the details. Regular maintenance, proper storage, and using the right tools will ensure your turntable and records last for years to come. Happy listening!
Subscribe to our email newsletter to get the latest posts delivered right to your email.
Comments